Wednesday, 30 June 2010
Moving out of the bedroom.
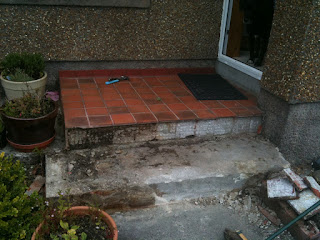
My mum has asked me now to do a load of different jobs around the house, first one I have decided to take up was the de tiling and re building of the step out the front of the house.
by
Alex
at approximately
12:43:00
Tuesday, 29 June 2010
Yet more bedroom updates...
Ok, so time for more bedroom updates. Re painting the window sill...
Varnishing the window frame.
Put in a door lining onto the new wardrobe door.
And slapped on a doorframe.
by
Alex
at approximately
16:23:00
Monday, 28 June 2010
Harry wants his dinner...
The dog has this habit of barking incessantly until we give in and place a bowl of foul smelling dog food infront of his nose. He still gets excited about the same food after almost 11 years on this planet!
by
Alex
at approximately
15:04:00
Sunday, 27 June 2010
More bedroom updates.
So since the wall has gone up I have mostly been building a shelf in this little alcove:

in the wardrobe to house some of my things which took me about half a day. End product...

Then yesterday I went to a lumber yard to purchase some skirting board and wood for my door frames which was nice! And today it is all (hopefully) going to be cut and fitted!

by
Alex
at approximately
11:38:00
Wednesday, 23 June 2010
Painting of the wardrobe
So I now have the outside and the inside of the wardrobe painted. Need to order a door to fit onto the frame, fit a light to the inside and a few rails for my clothes, a shelving unit into the corner for extra things and a little shelf along the wall for shoes etc. Then outside the room I need to fit a new skirting board all around the room and a new doorframe which I just ripped up, a new bedroom door, repaint my radiator and order a new carpet, repaint the loft hatch and then I can move back in! Exciting!


by
Alex
at approximately
13:44:00
Tuesday, 22 June 2010
Film developing
Since coming back from uni for the summer I learned the basics of developing black & white films with the expert tuition of my father and developed a film I used mostly while Maireid was up at home with me during easter. Here are a few photos...
by
Alex
at approximately
18:10:00
Fixing it up!
Ok, so since the last post I have taken the frame and fixed it to the wall...


Dragged a gigantic piece of MDF up the stairs...

Cut it up and attached it to the frame to make a wall...
And filled in the joints and painted a couple of layers of MDF primer onto the top...

by
Alex
at approximately
15:46:00
Sunday, 20 June 2010
Time to build the wardrobe!
So yesterday I went into town and we picked up a pile of wood. Not just any old wood from any old tree, but finely cut and finished wood from a magical tree! Or just a regular tree if you want to be boring and realistic. But anyway, here is my future wardrobe!

So once the wood was secure I measured the lengths of all the individual pieces I would need and cut them and transported them up to my room where I built the frame up on the bedroom floor...


So next stage is to mark out the position on the wall where this frame is going to be drilled into place and put a facing/new wall on it, fit a door, plaster up the joins and then paint it up like the rest of the room!
by
Alex
at approximately
11:15:00
Wednesday, 16 June 2010
First coat of colour!
So after the two coats of the base paint I began on the colour. A little adventurous with the selection but we'll see how it turns out. Anyway, here is the first layer of colour on the walls.


Once that was done I sat down and looked around and felt the yellow was slightly too yellow. Either that, or the blue underneath was making it look a little gaudy so the next layer I added half a pot of white into the mix and proceeded to cover yet more walls with paint. At this point the yellow, while not much different, looked a lot nicer so I decided to keep it. After that was done I touched up the edges with a small brush which took me quite a while as there were a few coats needed.

Then I ripped up the carpet and took off the skirting boards and hoovered up the dust that was left behind from the 20 odd y.o. carpet...


And now I find myself touching up small areas with paint and waiting for something else to do!
by
Alex
at approximately
12:18:00
Monday, 14 June 2010
Sunday, 13 June 2010
New summer, new project.
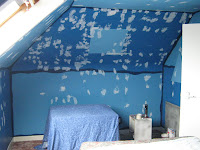
So, I got home about 2 weeks ago and within a day or two I found myself bored and with nothing at all to do. So while lying atop my bed listening to the Counting Crows one night, I found myself looking at the room and decided that it was too messy. Not messy in the sense that you couldn't see the floor for all of my things covering it (Although that was also the case) but messy in the sense that every single wall was plastered in posters. So much so that the majority of the paint underneath was no longer visible. I thought to myself, "I'm 21 now, this is too childish a room for me to be living in". So being midnight on a Sunday, like every other sane person out there on the planet earth, I decided that I was going to start taking down all of the posters and begin re-decorating the room. By about 4 o'clock in the morning the majority of the posters had been removed and there was little else I could do while the rest of the house slept so I decided that it would be a good time to join them and carry on when the sun had risen.So the next day I decided to go through all of my clothes and belongings and throw out almost everything that I owned. Which was satisfying! After the clothes and belongings had been religiously removed from my bedroom I began shifting all of my belongings down to the spare bedroom where I would be living for the next few weeks/months/years depending on the length of time this project would take to come to completion. Once this was done I began sanding down all of the little holes in the walls which had been left by the wall tacks from the posters. It is at this point I could imagine most people would have gotten bored and given up from the sheer amount of tedious work involved but surprisingly I was having a great time! Next step was to plaster up all of the holes to leave a nice smooth surface to paint over.


by
Alex
at approximately
21:45:00
Subscribe to:
Posts (Atom)


